User Guide
Setting network connections
NetTradeX PC
NetTradeX Android
NetTradeX iOS
NetTradeX Mobile
NetTradeX Advisors
- Introduction
- Account Opening
-
Trading
-
Lock Mode
- Market Order
- Pending Order
- How to Set Pending Order
-
How to Delete Orders
-
How to Change Orders
-
Orders Take-Profit and Stop-Loss. Mode “Trailing Stop Distance”
- How to Close the Opened Position
-
How to Unlock a Position
-
PCI Trading
-
Withdrawal requests
- Trading
- Pending orders
- Indicators
- Graphical Objects
- Alerts
- News
-
Lock Mode
-
User Interface
- Main Window
-
Terminal interface
- General settings
- Customize Windows Position
- Charts
- PCI
- How to Set Indicators
-
How to Modify Indicators
- Graphical Objects
-
How to Manage Charts History
-
Withdrawal Request
-
How to Set Alerts
- Printing
-
Customizing Financial Instrument List
- Import Settings
- Trading instruments
- Information Windows
- Windows Operation Factors Settings
- Workspace of Login
- Using Templates
- Setting terminal elements display
- Network connections
-
Export Settings
- Quick start guide
- F.A.Q.
Setting network connections
Setting network connections
To set network connections go to the "Terminal settings"window. Do as follows:
- Go to the “Network” tab.
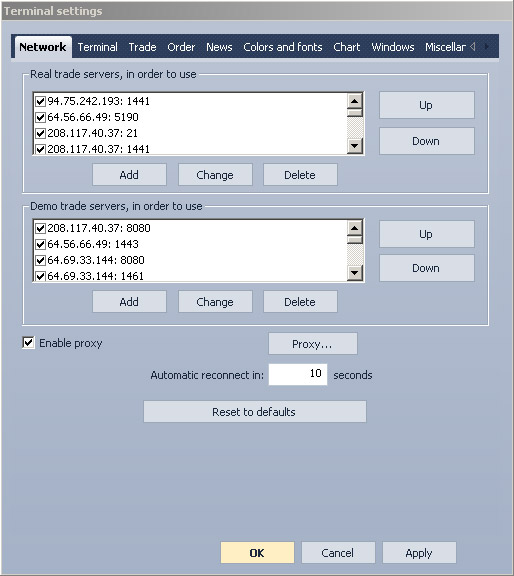
- Arrange real trade servers in order to use ( (see "Arranging trade servers in order" )
- Arrange demo trade servers in order to use (see "Arranging trade servers in order" )
- Set proxy server (see "Proxy settings" )
- Enter the frequency of reconnections in the “Automatic reconnect in” field in case of disconnection.
- Confirm by pressing “OK” or “Apply”.
Click “Reset to defaults” to switch to network default settings.
Arranging trade servers in order
To arrange the list of real and demo servers go to the “Network” tab in the “Terminal settings” window:
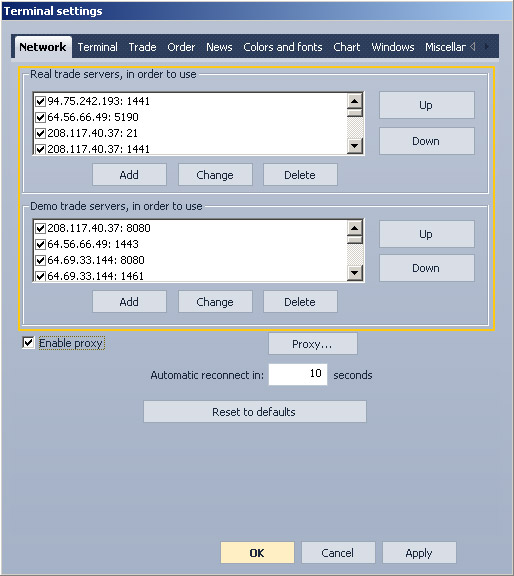
- The following commands will arrange the list of trade servers:
- Adding a server:
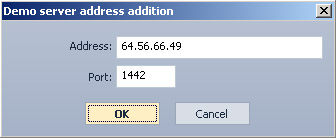
- Click “Add” in the corresponding area (demo or real). Enter trade server’s address in the opened window: “Real server address addition” or “Demo server address addition”.
- Enter IP address in the corresponding field.
- Enter port number in the corresponding field.
- Confirm the changes by pressing “OK” or exit without saving by pressing “Cancel”.
- Changing IP address:
- Click a trade server from the list (demo or real).
- Click the “Change” button below the list. Enter a new IP address in the opened window: “Real server address changing” or “Demo server address changing”.
- Enter a new IP address in the corresponding field.
- Enter a new port number in the corresponding field.
- Press “OK” to confirm the changes or “Cancel” to exit without saving.
- Deleting a server from the list:
- Click a trade server from the list (demo or real).
- Click the “Delete” button below the list.
- Adding a server:
- Set a server’s availability. If you remove a tick, the server will remain on the list, but the connection to it will be unavailable.
- Set servers’ priority for connection attempts by pressing “Up” and “Down” buttons which are located on the right. The higher the server is on the list, the more priority it has.
Proxy settings
You may set proxy in the “Terminal settings” window (the “Network” tab):
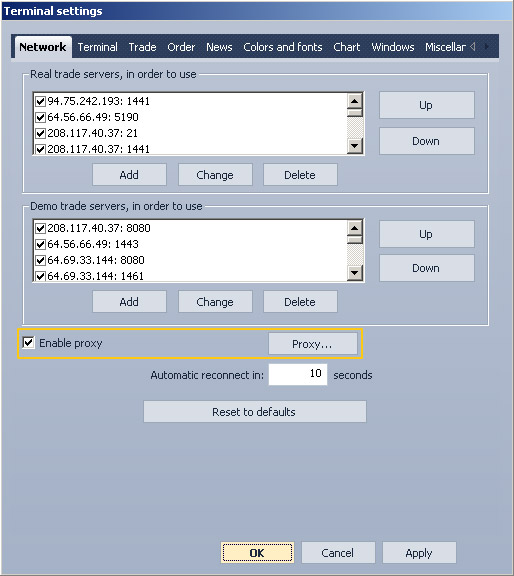
- Put a tick in the “Enable proxy” checkbox.
- Press “Proxy…”

- Enter in the “Proxy settings” window:
- Proxy address in the “Server*” field
- Proxy port in the “Port*” field.
- Choose a proxy type from the “Type*” drop-down list (HTTP or Socks5).
- Login in the “Login” field.
- Proxy access password in the “Password” field.
Fields marked with * are required.
- Press “OK” to confirm or “Cancel” to exit without saving.
Please note that if the proxy-server has firewall, the following ports must be open:
- 80 (НТТР, ТСР, outgoing), 21 (FTP, ТСР, outgoing), 1441 (ТСР, outgoing), 1442 (ТСР, outgoing) for real accounts.
- 8080 (Socks4, ТСР, outgoing), 1443 (ТСР, outgoing) for demo accounts.